.... and here's the the new blog
https://writeturnblog.wordpress.com
Saturday 5 November 2016
Wednesday 10 September 2014
Movin' On
Has it really been that long since we posted on here, two years!! Well that's because we been having too much fun and enjoying life.
You've probably guessed from the title that something's happening. We've lived here for nearly eight years and we've decided it's time for a change. We're moving on and going back to dry land but are going to keep with the nautical theme and live by the sea.
But first of all we need to sell Real and she's up for sale with Premier Houseboats and then we have the interesting job of packing and moving.
We have had a great time living afloat and we'd definitely recommend it, but I think we've just got the seven year itch.
Maybe I'll start another blog about life by the sea - Living on the Edge maybe :-)
Monday 16 July 2012
A distraction
Part one
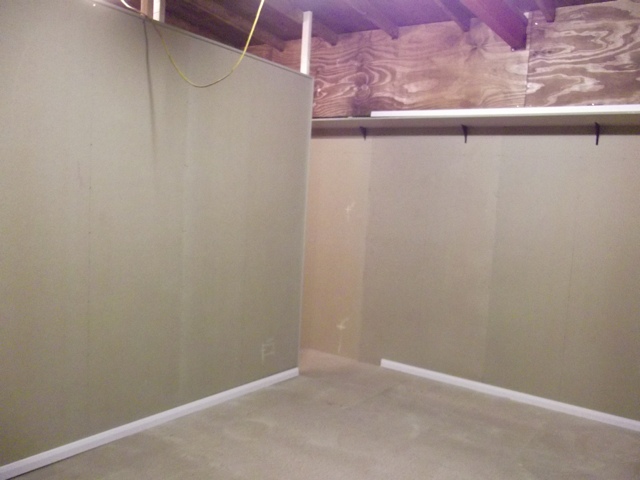
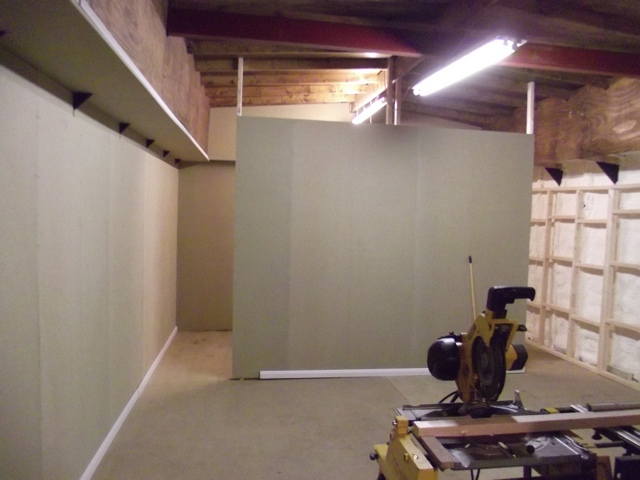
Over time we have collected a lot of scrap wood left over from the building work. Most of this is too small to do anything significant with but too large for me to be able to part with and throw away. Every time we want to do any work we have to keep moving the wood pile and so it was time to do something with it.
 We needed a bigger dining table, so I'm told, and a plan began to hatch to combine what we had with what we needed. On their own the ply sheets wouldn't make a table but if cut up into strips and then sandwiched together they just might. I'd already had a little play with this when building the store room (details to come) and I ran out of wood for the frame and was pleased with the result albeit a bit heavy. The fabricated 2x4 was just a strong, if not stronger, than a basic timber one and went to the top of the class for recycling. After several 'back of an envelope' drawings and visits to furniture shops to measure tables (to make sure they fitted of course) we set about cutting the leftover sheets of ply into narrow strips. Mounting the circular saw upside down in a Workmate proved very useful.
 Next came sandwiching these strips together to gradually build up the frame of the table

 And then fitting them all together


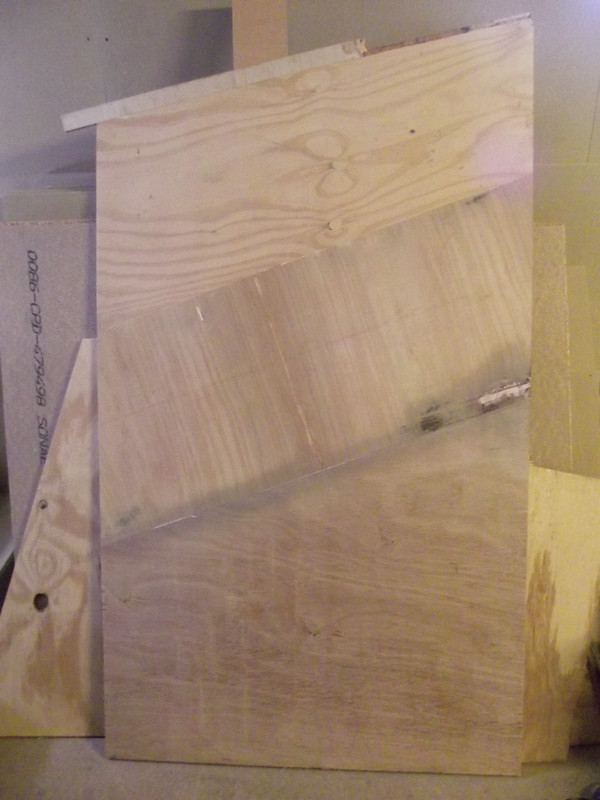
 The next tricky part was the table top, we didn't have a single sheet of wood that would cover it all so we decided to use several small sheets with the joins at jaunty angles to make a feature of this. Table top mk1 was going quite well until it came to sanding it and this is where I found out about voids in ply wood. As you probably know plywood is made up of several thin wood veneers sandwiched and glued together, obviously these veneers aren't all as large as the final sheet so several are laid side by side and this is where the voids happen. If the veneers don't overlap slightly then there's going to be a gap between them, most of the time this isn't a problem but when you start sanding large amounts off the faces to get two sheets to match then you start going through the veneers and if there a gap you end up with a huge holes. I did start to try filling these holes with wood filler but it just didn't look right.
 On to table top mk2..........
To be continued
Over time we have collected a lot of scrap wood left over from the building work. Most of this is too small to do anything significant with but too large for me to be able to part with and throw away. Every time we want to do any work we have to keep moving the wood pile and so it was time to do something with it.


To be continued
Saturday 7 July 2012
The reason .....
.... some things never seem to get finished. Part one
This isn't particularly related to the conversion work on Real, but is one of those occasional ramblings promised in the title.
Do you ever start something only to find you have to do something else and then something else to be able to finish? Well, this is what happened to me recently.
Out of our windows we have an ever changing scene, the tide coming in and going out, boats going passed, wildlife etc and I decided it might be a good idea to make a time lapse video of this. I already had a cheap webcam I'd picked up some time ago and thought ths would be ideal, but I couldn't realistically use our desktop pc as I was too far from the window and the cable was no where near long enough and I didn't want to buy another cable for this one off experiment. This meant getting out our ancient laptop, but the problem here was that it was running really slowly on Windows XP and although I managed to get some video made it kept hanging and crashing. At the same time I also found that webcams, especially cheap ones, aren't very good at filming in sunlight or in the case of the one I have in any light at all, I think they must be designed for dark and dingy geek bedrooms or at least artificial light. I decided to tackle the slow running and crashing laptop first. A long time ago I'd played around with Linux on an even older laptop, which doesn't work so well now as I used parts from the CD drive to repair our hi-fi, but that's another story, and decided this would be ideal for this current one and there seemed to be a fair amount written about time lapse video and Linux. After trying about 5 different versions I finally found one (Puppy Linux) that would work with this veteran computer, I believe normally this isn't a problem but this laptop seems to have an odd screen that some of the versions I tried didn't like.
OK, now I have to learn how to use Linux. As it turns out a lot of it is GUI (graphical user interface or windows) based so I didn't have to worry too much about command lines which, although I'm sure I could get the hang of eventually, did make setting it all up easier. I found that the webcam software (GTK+ UVC Viewer) that comes in the latest version of Puppy Linux doesn't have an obvious time lapse feature but with a little tweaking of the configuration file you can set it to 'sleep' between frames, meaning I could set it to take one frame every 30 seconds or so.
So, laptop setup ready to go, but I've still got the problem with the webcam unable to take video in daylight without being completely washed out (actually just white in most cases). I did find that taping a lens from an old pair of sunglasses helped a bit but then when the sun went behind a cloud everything went black as the auto settings in the software just couldn't handle this odd setup. On searching the Internet I did come across this useful Instructable - Convert a Webcam to work outdoors in bright light., my initial tests haven't been that successful but I did then get distracted by something else........
As you can see, what started out as a simple idea then starts to get complicated especially when I get distracted. Of course the easy solution would be to buy a longer USB cable to use the desktop computer and a better webcam that works in daylight, but where's the fun in that?
To be continued
Monday 2 July 2012
Normal service may be resumed
I know it's been almost forever since we've posted anything and anyone that's been following us has now given up any hope of us posting again. We've been quite busy, not only working on our home but also enjoying life afloat and it's the enjoying part that's responsible for reducing the post frequency, plus I got an iPad some time back and haven't found a decent app for creating posts, well that's my excuse and I'm sticking to it. So, here it is, an update on what we've been up to over the last million months.
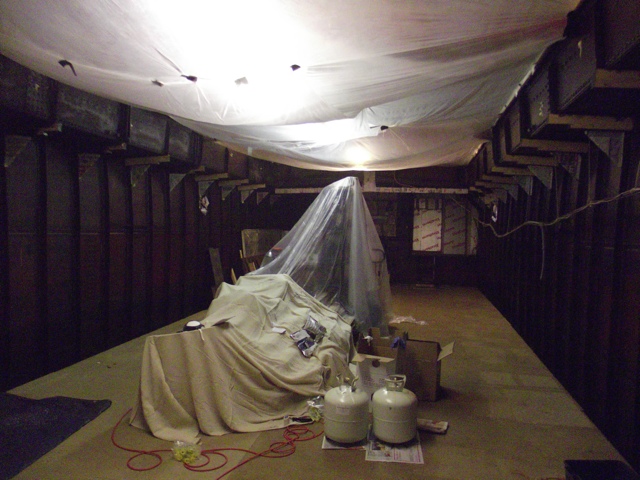
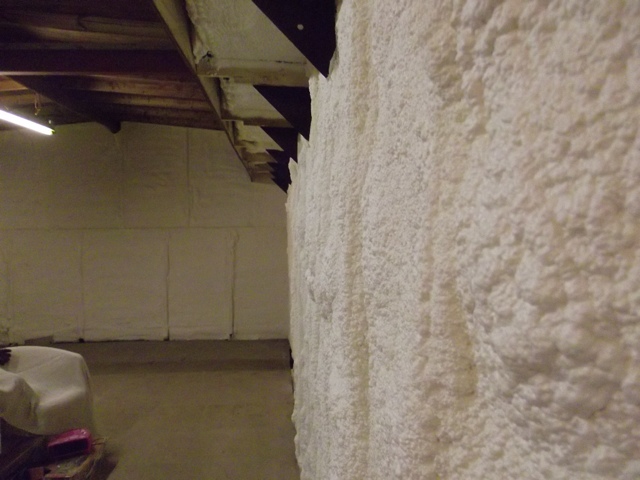
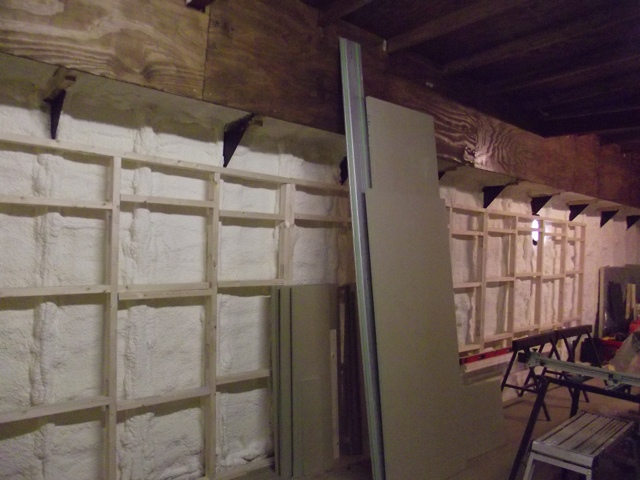
We completed the spray foaming with no catastrophes and actually with not even anything amusing to say about it. It was a very successful and carefully planned exercise and we finished it in one weekend. We protected all the ceiling with cheap plastic dust sheets, which was a bit like trying to cover everything in cling film as they were so thin but it worked and then set about spraying. We did come up with a couple of useful tips for anyone that wants to do this. Spray in several thin coats, we went over the whole area about three times gradually building up the thickness and we also found it best to spray the first two coats with the fan nozzles to give an even coat and then to use the cone nozzles for the final coat as this then lets you build up any areas that are a bit sparse and also allows you to get into the little fiddly areas that the fan spray just keeps missing no matter how many times you go over it. Now we had a nice cosy area, that looked a bit like the inside of a meringue or some mad Santa's winter wonderland.
 |

 |
Okay that's it for now, all being well and now I've found a half decent app for me iPad I can post with (it's Blogsy if anyone's interested) there should be more regular updates coming with some catch ups for the last year or so.
Saturday 22 January 2011
Saturday 11 September 2010
Subscribe to:
Posts (Atom)

